Here is an Arduino IDE based ESP32 Air Quality Monitor device that measures outdoor pollution levels using primary gaseous pollutants like nitrogen dioxide and ozone. The device then uploads this telemetry to a server that visually displays the data on an IoT dashboard.
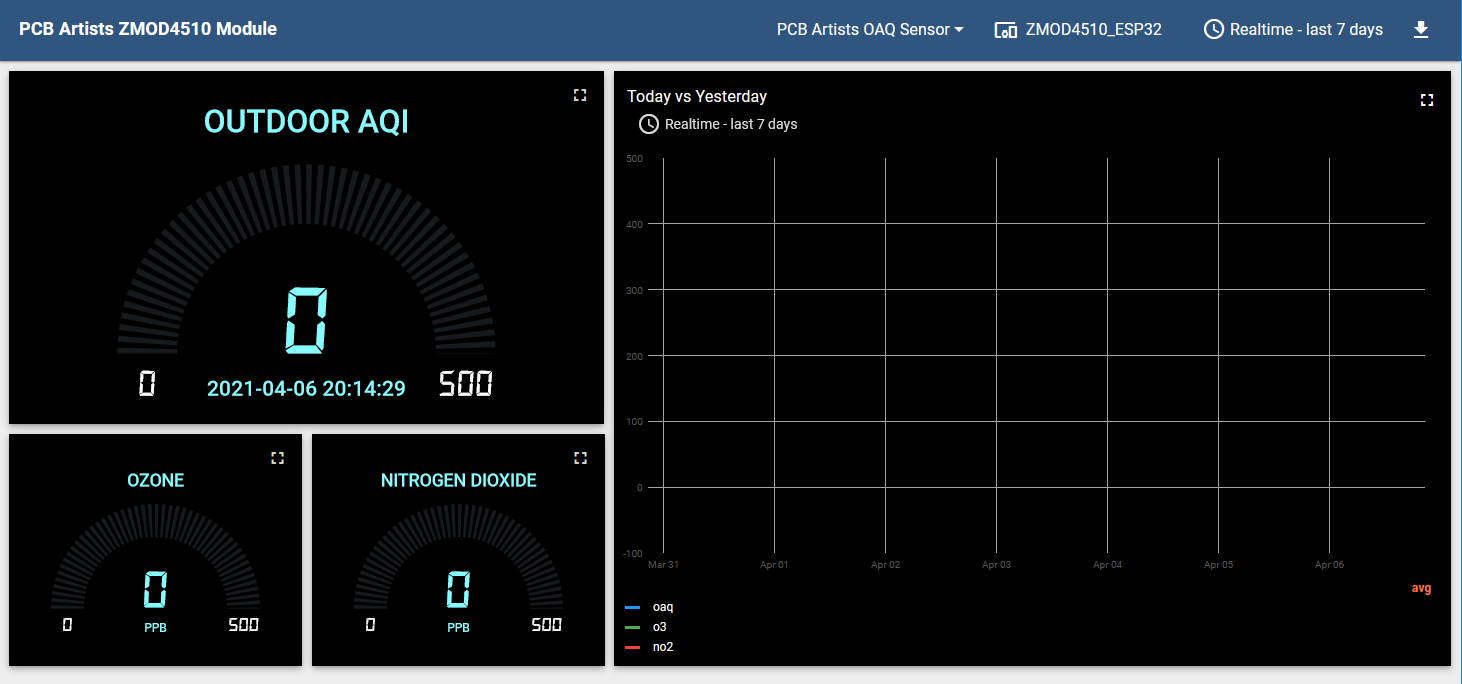
The dashboard shows current levels of AQI (air quality index), NO2, O3, and historic data in the form of a chart.
The sensor used for air quality measurement is the ZMOD4510 UART module.
Introduction
The project has a few major components or blocks:
- The ESP32, which is the main MCU that samples the sensor and uploads data to the server.
- The ZMOD4510 module, which senses the gas levels and figures out the AQI and other pollutant levels.
- The ThingsBoard server, which displays the data available via a visual dashboard and also stores the data points.
Introduction to ThingsBoard
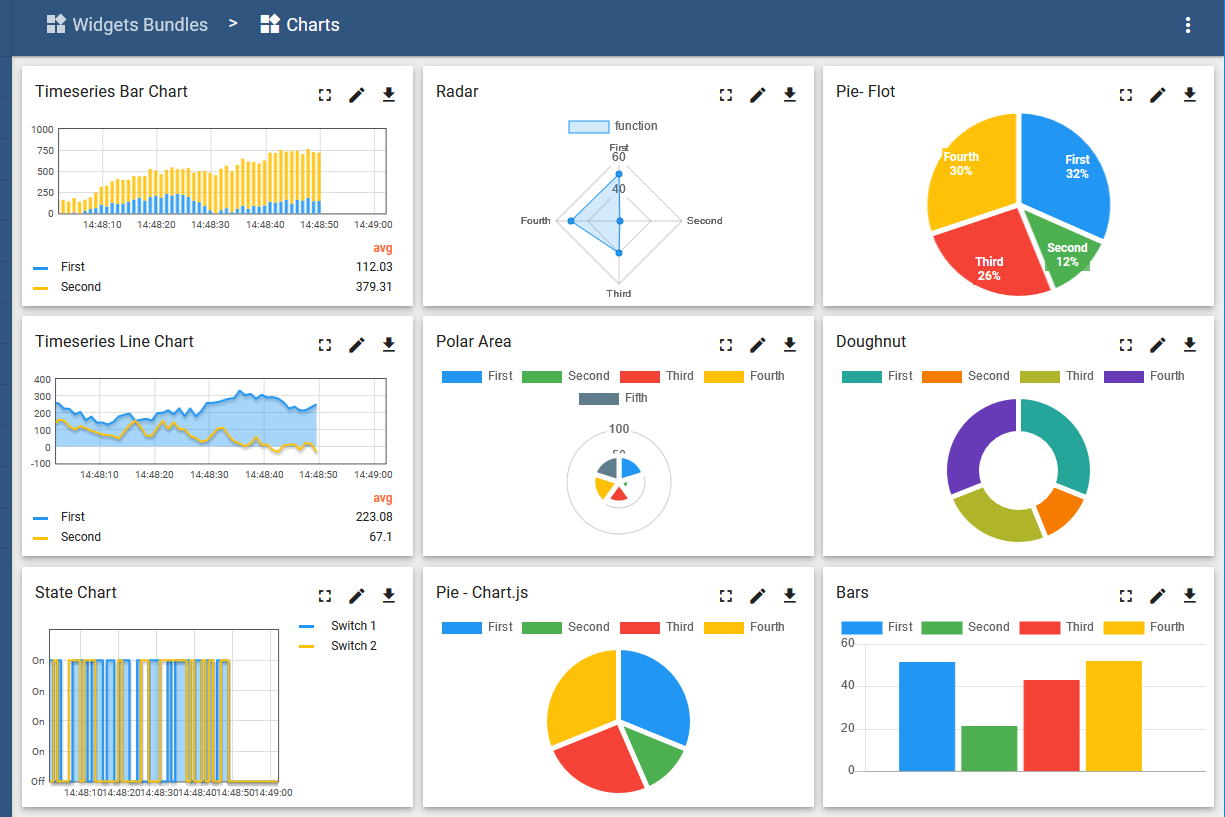
ThingsBoard allows you to create rich, full featured IoT dashboards with a bunch of widgets and a drop-and-drop editor. You can customize a lot of parameters and properties of these widgets to create a dashboard. The good things is, you can also choose to not touch a whole lot of settings and ThingsBoard will still make a decent and presentable dashboard for your devices.
You need not have any programming knowledge to be able to make and administer a simple ThingsBoard dashboard.
Not only the visual dashboard, but the communication protocol with the demo servers is very easy. Setting up devices and then sending data over HTTPS takes a few lines of Arduino code only. We love the simple POST request based approach because somehow a lot of our clients have applications that best benefit from that approach.
ThingsBoard also supports MQTT and CoAP, which is nice if you need them. However, we will only use HTTPS POST requests and send JSON strings to the ThingsBoard demo server in this article. That keeps the code simple and makes the whole thing easy for absolute beginners to follow.
Introduction to ESP32 and ZMOD4510
The hardware we use in this project is the ESP32-PICO-D4 board designed by Espressif. The board is called the ESP32-PICO-KIT. You can use any ESP32 development board you want to. Just make sure that you have at least 2 GPIO pins that can act as UART TX and RX pins for communication with the sensor module.
The outdoor air quality sensor used in this project is the PCB Artists ZMOD4510 module, which is based on the new MEMS OAQ sensor ZMOD4510 developed by IDT/Renesas.
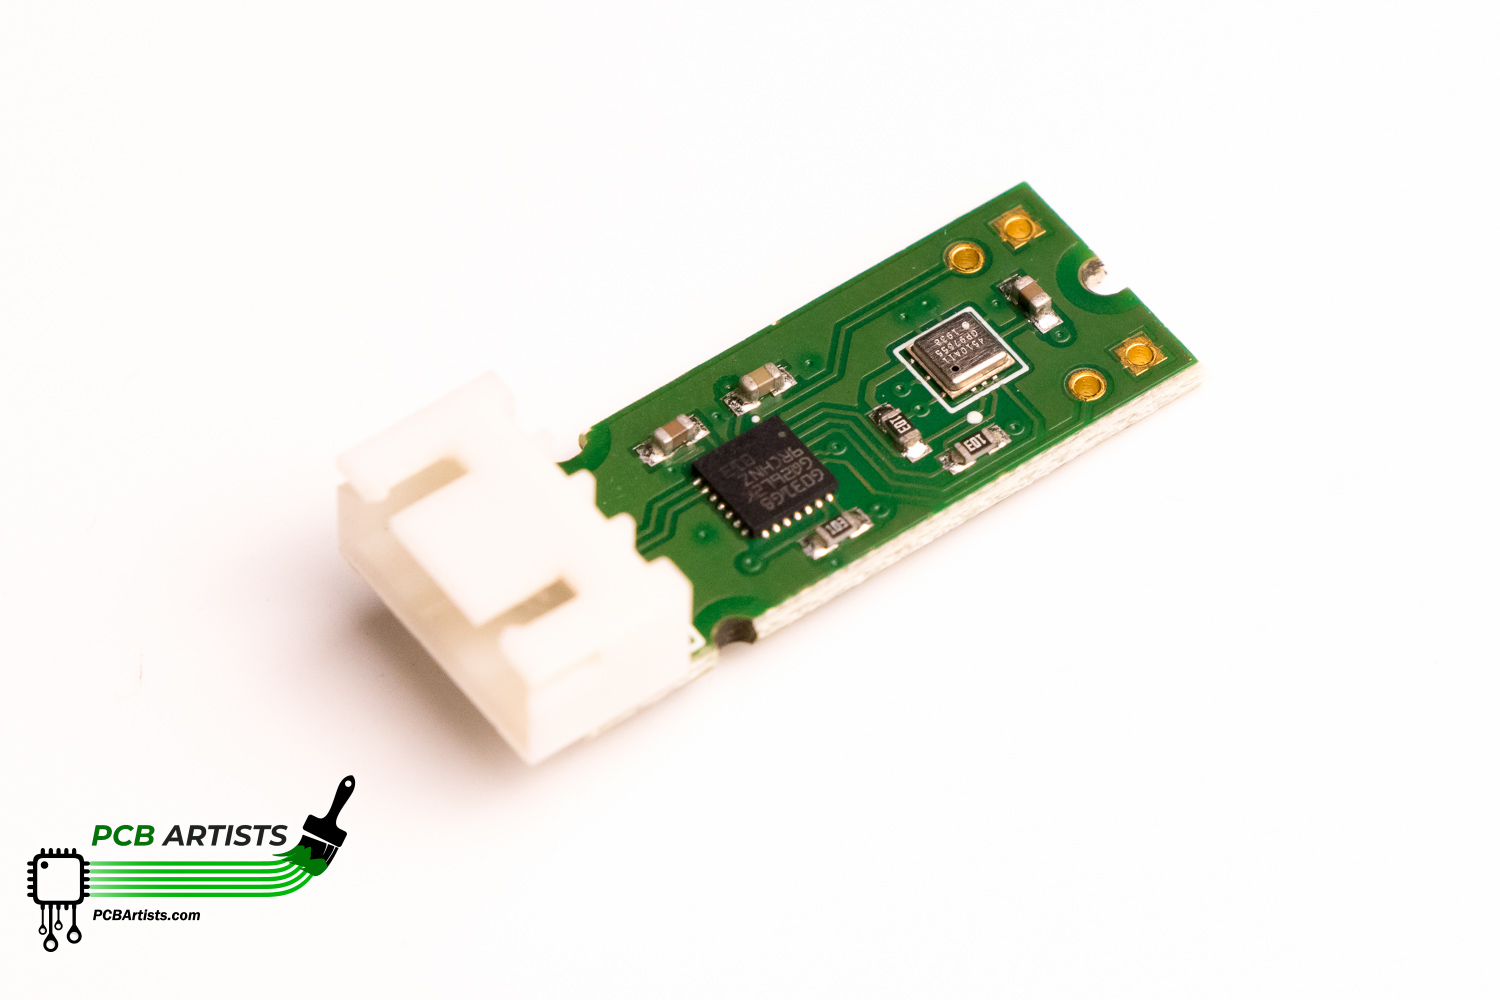
The ZMOD4510 module sports a UART interface and has an STM32 M0+ MCU on board to do all the number crunching for you. The ESP32 here, which is the application controller, simply needs to send a power-up command to the sensor module and then read out data as necessary.
The sensor returns AQI value, concentration of NO2 and O3 in a standard format, which is an ASCII string that the ESP32 can directly upload to the server as telemetry.
Sending a command and receiving a reply from the sensor is very easy using Arduino code for ESP32. For example, here is how the code issues the ID command to the sensor and reads back its unique ID.
// Issue ID command and read response
Serial2.print ("ID\n");
memset (zmod_response, 0, sizeof(zmod_response));
Serial2.readBytesUntil('\n', zmod_response, 16);
ID = zmod_response;
Serial.println ("ZMOD4510 module ID is 0x" + ID);
This example project uses 4 commands that are necessary to read back data from the sensor after powering the module up:
- PU command: Powers up the module and starts sampling the air
- AQ command: Returns the latest calculated value for the AQI (US EPA standard)
- NO command: Returns the concentration estimate for NO2 in ppb
- O3 command: Returns the concentration estimate for O3 in ppb
Setting up the ESP32 Air Quality Sensor on ThingsBoard
- Sign up on ThingsBoard if you have not already. It is free to use the demo account. The features are sufficient for this air quality monitor project.
- Once you are signed in, click on the Devices tab on the menu on the left. You will see some demo devices listed. Click the “+” icon on the top right corner to Add a Device.
Create this new device with basic details as you like.
In our example,
Name: ZMOD4510_ESP32
Label: OAQI_ESP32
Transport Type: Default (for HTTP)
Device Profile: Leave to default
Description: Outdoor AQI monitor demo using the ESP32 and PCB Artists ZMOD4510 Module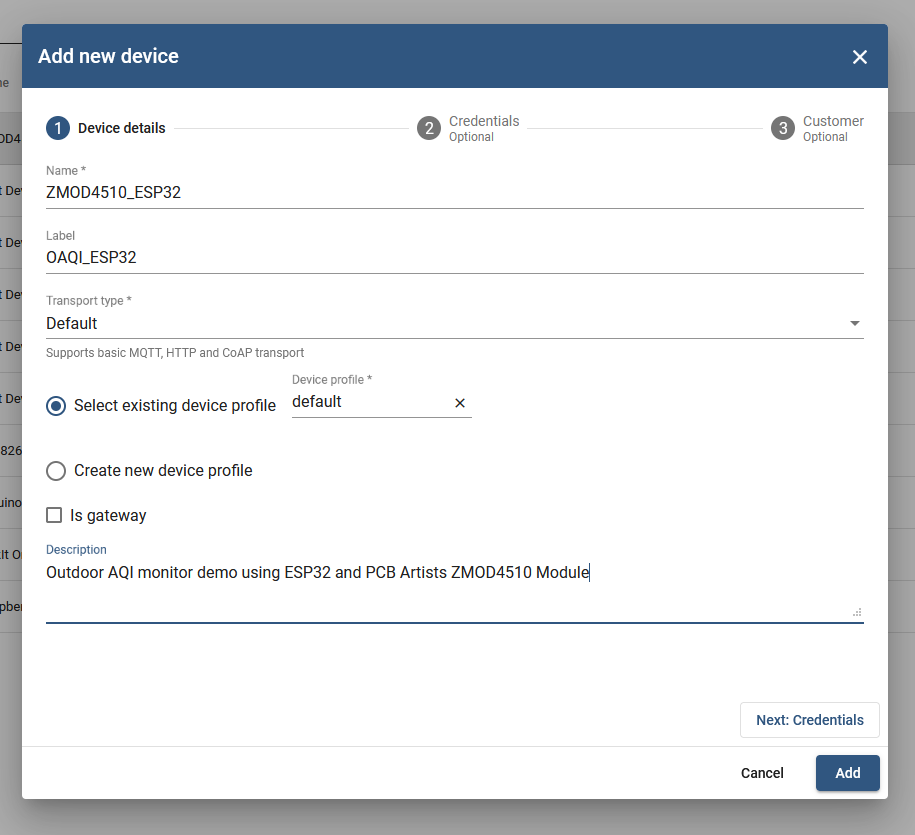
ESP32 Air Quality Monitor Device Setup, ThingsBoard
- Add this device. You should now be able to see the device added to the list of devices, along with the demo devices.
- Click on the ZMOD4510_ESP32 device again and copy the Access Token. This access token is used by the device to upload data to the ThingsBoard server as you will see later.
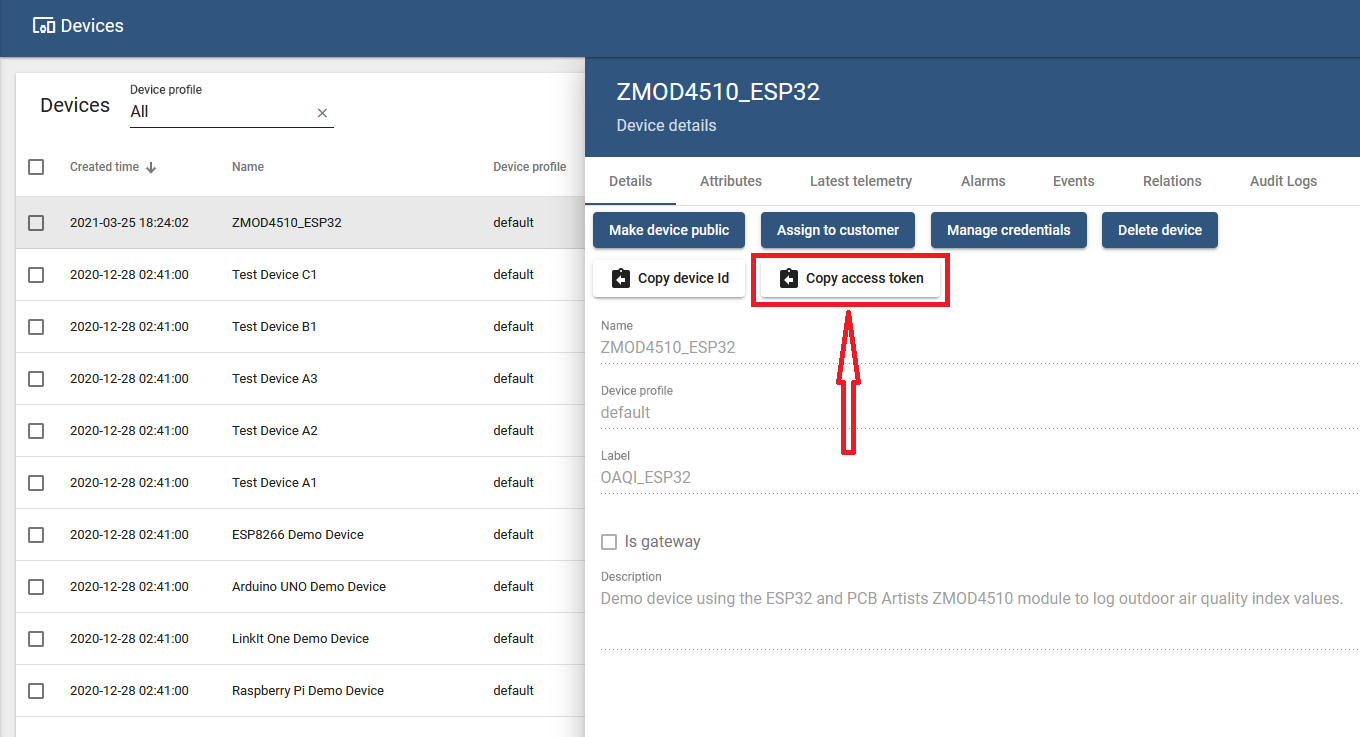
Copy access token for the ESP32 device
- That is all you need to do to set your ESP32 air quality monitor device up on ThingsBoard!
Testing the ThingsBoard API
Now that you have created the ThingsBoard device and corresponding dashboard for the ESP32 air quality sensor, it is a good idea to try and test the ThingsBoard device and dashboard configuration.
To test the ThingsBoard API, you can simply make POST requests over HTTPS with the data payload and it should be visible to you on the device telemetry tab.
Note that the telemetry tab on ThingsBoard only displays the latest value received for a certain parameter. But this is definitely sufficient to ensure that the communication is working properly and data is being uploaded to the demo server.
You can use ReqBin for testing and validating communication. The website is very useful for testing as it lets you make HTTP requests easily.
- Set the request type on ReqBin to POST.
- Set the URL that a device must use for ThingsBoard telemetry submission:
https://demo.thingsboard.io/api/v1/THINGSBOARD_ACCESS_TOKEN/telemetry - Make sure that you replace THINGSBOARD_ACCESS_TOKEN in the URL above with your device access token. The key is what helps the ThingsBoard server figure out which device is making the request.
- The “Authorization” tab need not be changed as we don’t have any auth procedure in place.
- In the “Content” tab of ReqBin, paste in the following JSON string with dummy parameters that you need to send as telemetry. Of course, the content type should be set to application/json.
{"id": "AABBCCDDEEFF", "oaq":30, "no2":73, "o3":73}Once you make this POST request, you should get a 200 response from the ThingsBoard server.
If you get a 400 or 40X response, it means that the device API key may be incorrect or the demo server URL is probably incorrect in some way.
Here is what a good call to the ThingsBoard server looks like on ReqBin.

Preparing the ESP32 Air Monitor Thingsboard Dashboard
Once you have confirmed that the ThingsBoard device profile has been created successfully and that the communication format is all good, you can proceed to create a simple dashboard for the ESP32 air monitor.
The steps needed to set up the dashboard are extremely simple and only involve dragging and dropping widgets into a blank dashboard.
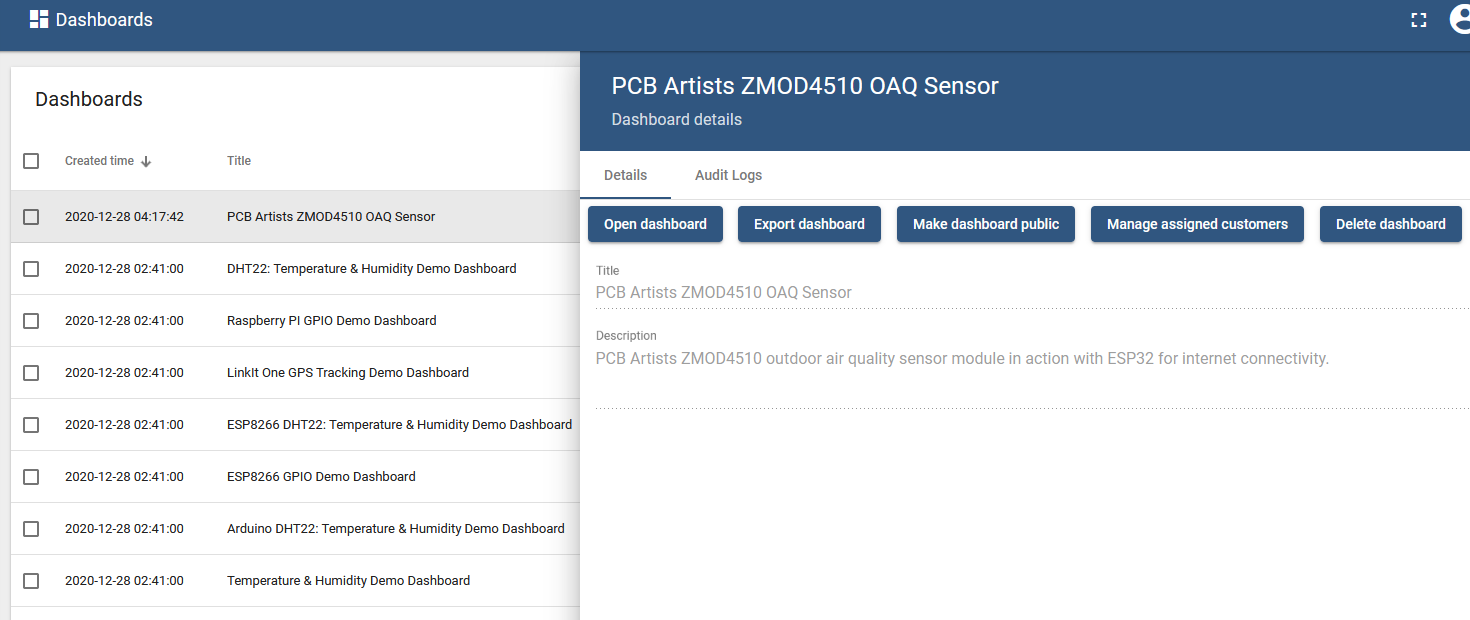
- Create a new dashboard by going to Dashboards on the left panel and clicking the “+” icon on the top right corner.
- As shown above, add in a Title and Description for the new dashboard.
- Click on Open dashboard and drag-drop widgets of your choice into the dashboard.
We made a simple dashboard that has- AQI level meter, fuel gauge style
- NO2 level meter, fuel gauge style
- O3 level meter, fuel gauge style
- A chart showing past 24 hours of data
You can set up your own dashboard with widgets of your choice or you can simply use our dashboard by creating a new dashboard and importing our dashboard.
You can download the JSON file for our ThingsBoard dashboard here. Extract the JSON file from the ZIP and import the file to copy our dashboard.
ESP32 Arduino Code for Air Quality Sensor
Here is the full Arduino code for the ESP32 air quality sensor. The code is very basic and does nothing other than just connect to a WiFi network and upload telemetry to the Thingsboard demo server.
Before copying the code over, make sure that you have the Arduino IDE installed and configured for compiling ESP32 programs. Here is a simple Windows tutorial on how to set up Arduino for ESP32.
To build the ESP32 air quality sensor example project source code listed below, simply create a new Arduino sketch and copy the example code into it. Remember to set the Tools > Board to reflect your ESP32 board and also set the COM port to the correct one.
For this project, we set the Board to ESP32 Pico Kit.
Here are the changes that you need to make, with the line numbers:
- Line 18: Replace WIFI_SSID with your network name
- Line 18: Replace WIFI_PASSWORD with your network password
- Line 97: Replace THINGSBOARD_ACCESS_TOKEN with your device API key from the device profile
#include <WiFi.h>
#include <HTTPClient.h>

// Serial is used for debug log printing
// Serial2 is used for ZMOD4510 sensor interface

// Set up WiFi and serial ports
void setup()
{
  Serial.begin (115200);

  // Set up UART for ZMOD4510 module, 9600-8-N-1
  Serial2.begin (9600, SERIAL_8N1, 5, 4); // Rx and Tx
  Serial2.setTimeout(1000);

  // Delay needed before WiFi is set up
  delay (5000);
  WiFi.begin ("WIFI_SSID", "WIFI_PASSWORD");

  while (WiFi.status() != WL_CONNECTED)
  {
    delay (1000);
    Serial.println ("Connecting to WiFi network...");
  }
  Serial.println ("Connected!");
}

void loop()
{
  char zmod_response[16];
  String ID, AQI, NO2, O3, AQIjson;

  // Loop until module responds to power up command
  while (1)
  {
    // Issue PU command and read response
    Serial2.print ("PU\n");
    memset (zmod_response, 0, sizeof(zmod_response));
    Serial2.readBytesUntil('\n', zmod_response, 16);

    if (zmod_response[0] != 'S')
    {
      // Could not get desired response to PU command
      Serial.println ("Trying to initialize ZMOD4510 module...");
      delay (1000);
      continue;
    }
    else
    {
      // All good!
      Serial.println ("ZMOD4510 is powered up!");
      break;
    }
  }

  // Issue ID command and read response
  Serial2.print ("ID\n");
  memset (zmod_response, 0, sizeof(zmod_response));
  Serial2.readBytesUntil('\n', zmod_response, 16);
  ID = zmod_response;
  Serial.println ("ZMOD4510 module ID is 0x" + ID);

  // Get data from module
  while (1)
  {
    // Issue AQ command and read AQI value
    Serial2.print ("AQ\n");
    memset (zmod_response, 0, sizeof(zmod_response));
    Serial2.readBytesUntil('\n', zmod_response, 16);
    Serial.printf ("Debug AQI $: %s\n", zmod_response);
    AQI = zmod_response;

    // Issue NO command and read NO2 value
    Serial2.print ("NO\n");
    memset (zmod_response, 0, sizeof(zmod_response));
    Serial2.readBytesUntil('\n', zmod_response, 16);
    Serial.printf ("Debug NO $: %s\n", zmod_response);
    NO2 = zmod_response;

    // Issue O3 command and read O3 value
    Serial2.print ("O3\n");
    memset (zmod_response, 0, sizeof(zmod_response));
    Serial2.readBytesUntil('\n', zmod_response, 16);
    Serial.printf ("Debug O3 $: %s\n", zmod_response);
    O3 = zmod_response;

    // {"id": "AABBCCDD", "aqi": 10.0, "no2": 20.0, "o3": 30.0}
    AQIjson = "{\"id\": " + ID + ", \"aqi\": " + AQI + ", \"no2\": " + NO2 + ", \"o3\": " + O3 + "}";
    Serial.println ("JSON: \n" + AQIjson);

    // Make a POST request with the data if WiFi is connected
    if ((WiFi.status() == WL_CONNECTED))
    {
      //Check the current connection status
      HTTPClient http;

      http.begin("https://demo.thingsboard.io/api/v1/THINGSBOARD_ACCESS_TOKEN/telemetry");
      http.addHeader("Content-Type", "application/json");
      int httpResponseCode = http.POST(AQIjson);   //Send the actual POST request

      if(httpResponseCode>0)
      {
        String response = http.getString();                       //Get the response to the request
        Serial.println(httpResponseCode);   //Print return code
        Serial.println(response);           //Print request answer
      }
      else
      {
        Serial.print("Error on sending POST request: ");
        Serial.println(httpResponseCode);
      }

      http.end();  //Free resources
    }
    else
    {
      Serial.println ("Something wrong with WiFi?");
    }

    delay (10*60*1000);  // 10 * 60 seconds between updates
  }
}
Air Quality Sensor Performance and Conditioning
This article or tutorial documents the creation of an IoT outdoor air quality monitoring system based on the ESP32 (PICO-D4 variant) and PCB Artists ZMOD4510 outdoor air quality sensor.
The air quality sensor has an UART interface fixed to operate at 9600-8-N-1. Air quality indicators such as the Air Quality Index (AQI), concentration of NO2 and O3 are all output as fixed format floating point numbers by the ZMOD4510 module.
The ESP32 takes these air quality indicators and posts them to Thingsboard as telemetry. The data is posted in a simple HTTPS request to the Thingsboard server. The server then displays the data in the form of charts that update in real time. The charts are public and you can view a live demo of it here.
Change Log
- 5 February 2023
– Initial release