The ESP32 is capable of handling both Wi-Fi and ethernet on its own, so adding a SIM7600 modem is a much-needed upgrade in applications that need standalone internet access or are meant for IoT applications like vehicle tracking or field application with no easy connectivity options.
This article contains note on using Arduino to make the ESP32 SIM7600 modem interface work and send an HTTP GET request to a server.
ESP32 SIM7600 Cellular Modem Hardware
Let me start with providing you with some information on the ESP32 cellular modem hardware used to flash the Arduino code. The ESP32 SIM7600 interface is standard across most of our designs. In case you might be interested, I have a detailed note about the ESP32 modem interface and reference schematic.
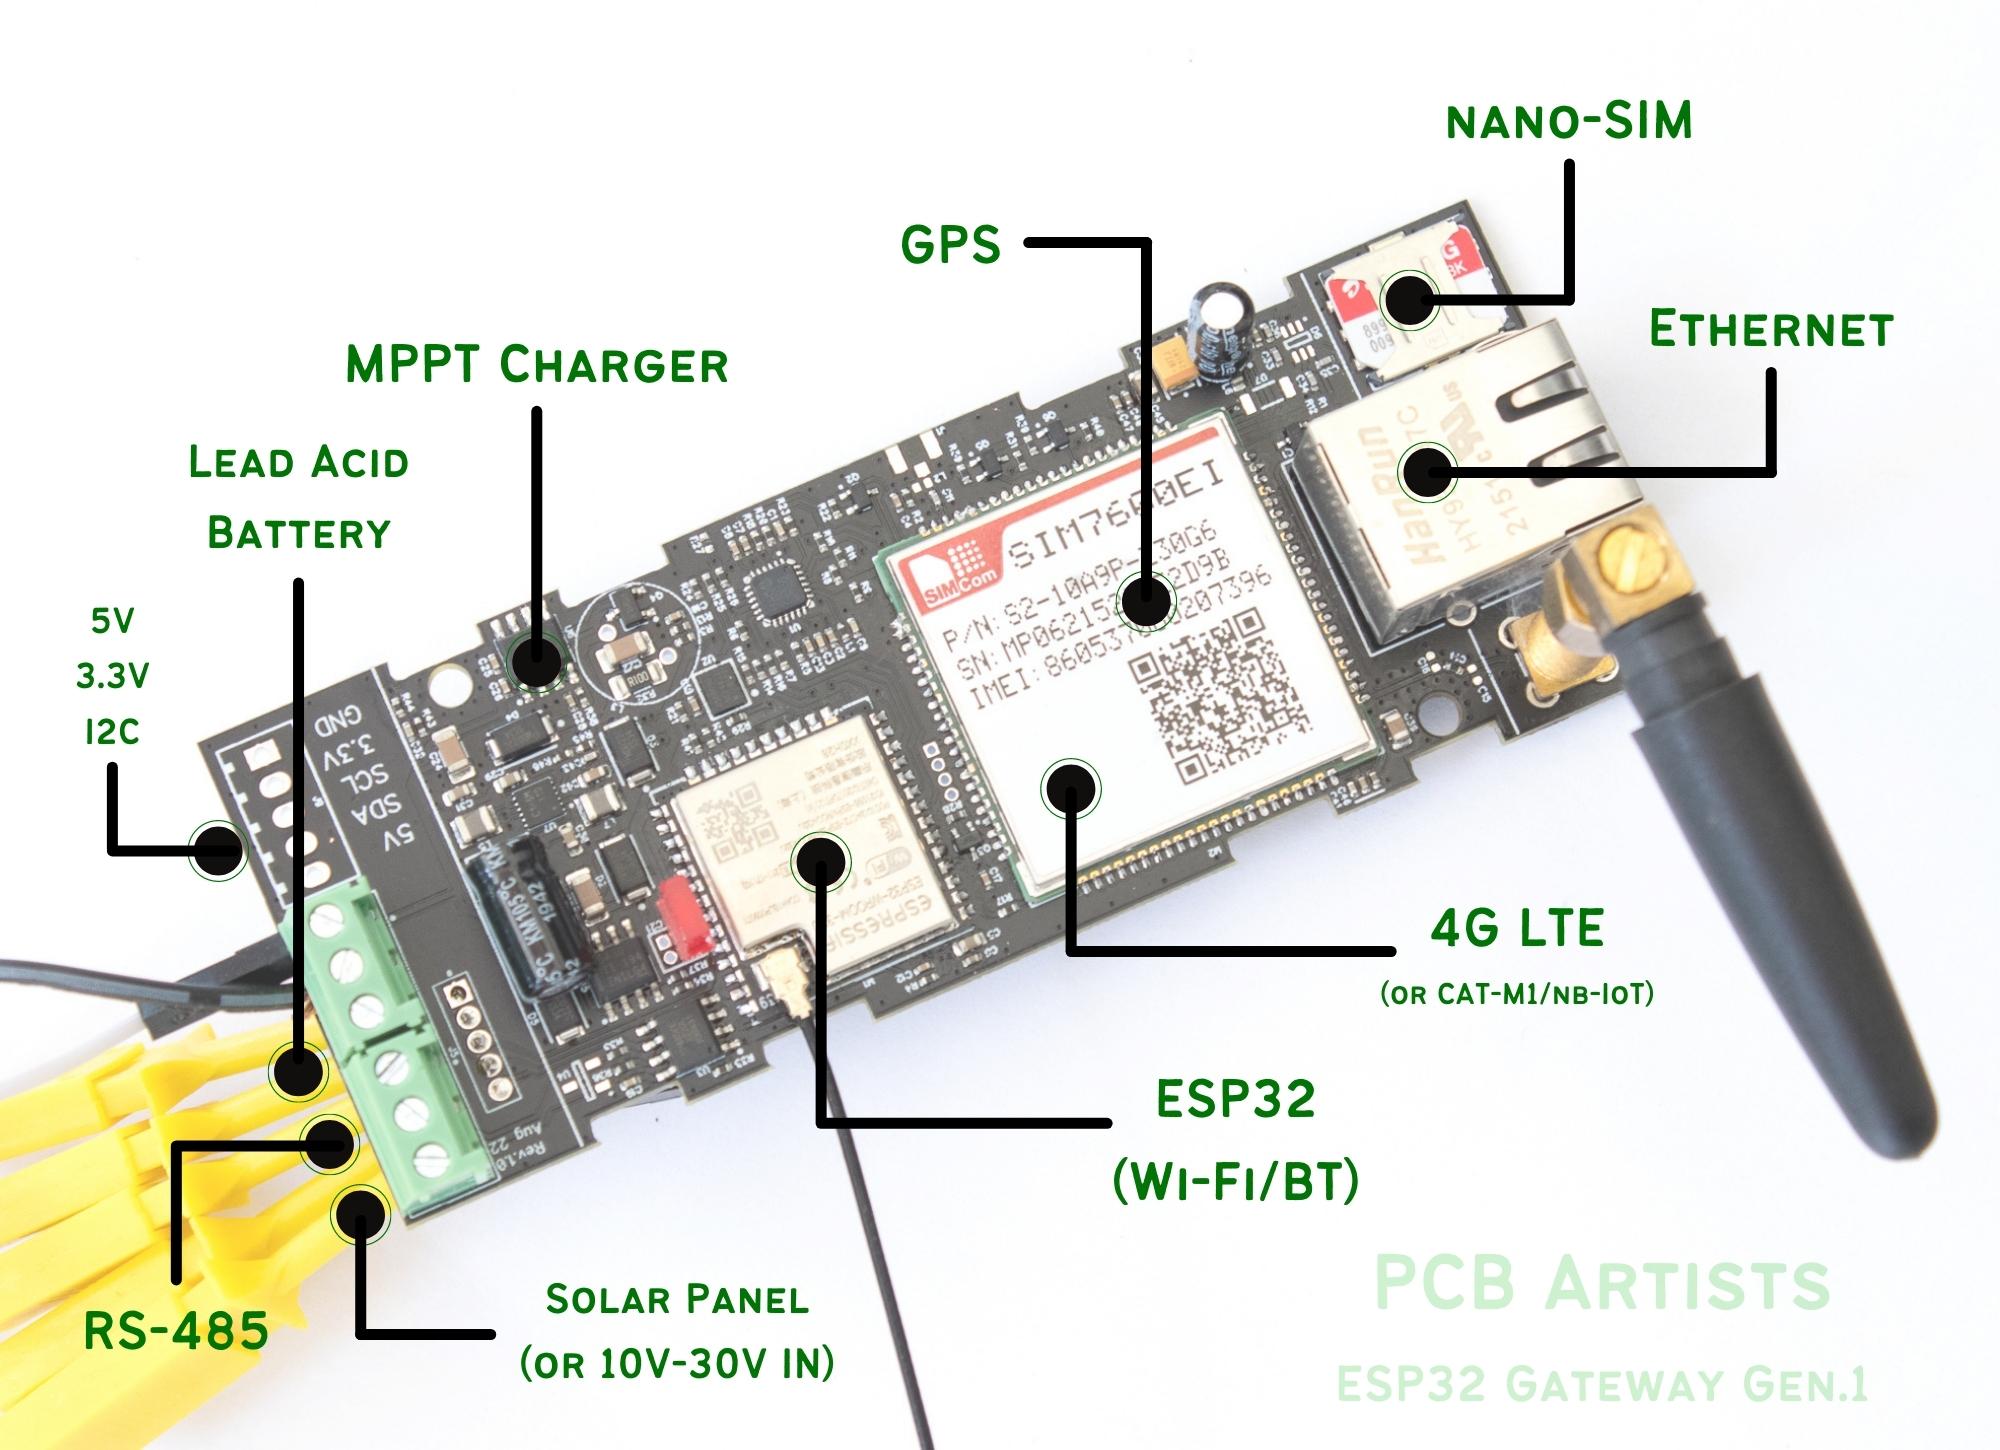
In this particular case, I am using the new PCB Artists ESP32 Gateway Gen.1, which has a ton of features packed into a tiny PCB and DIN rail enclosure (enclosure not shown in image). Our Gen.1 IoT Gateways are minimal devices meant for use as communication controllers.
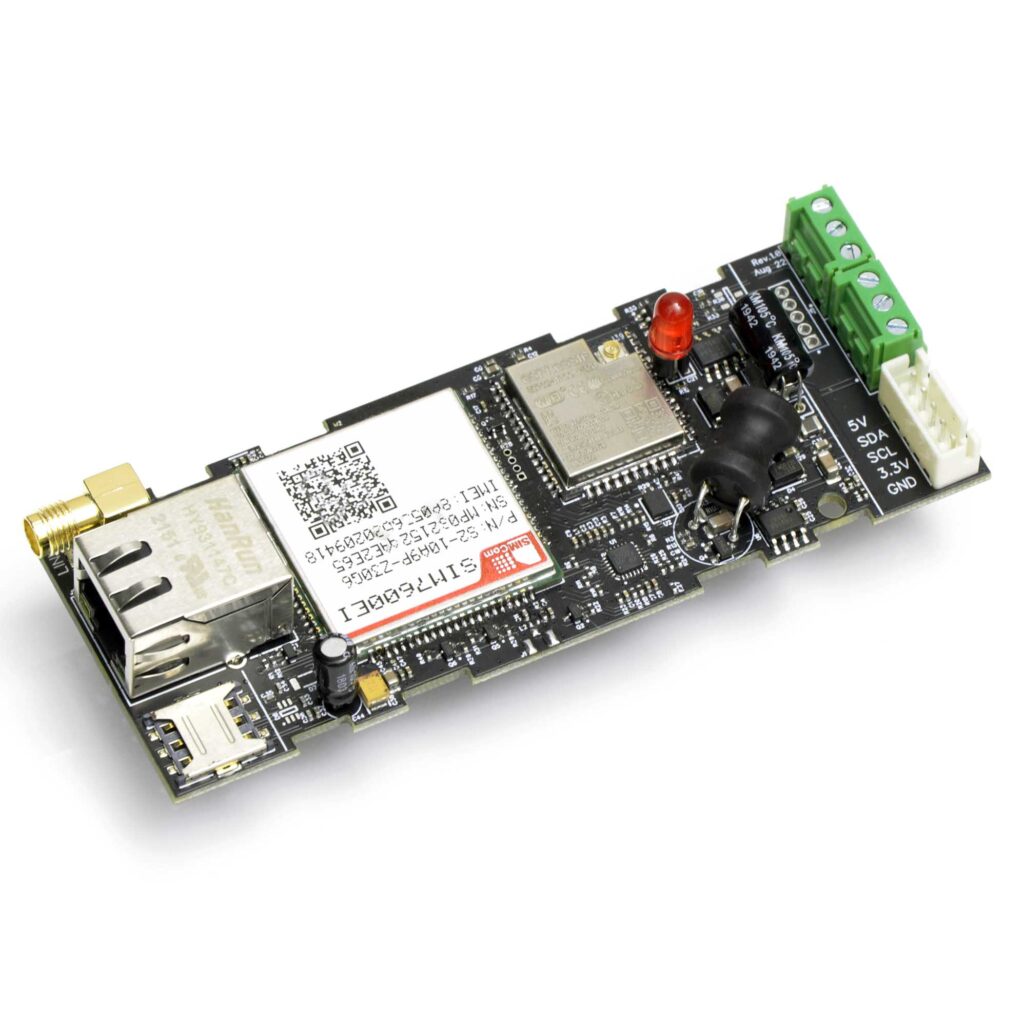
SIM7600 based ESP32 gateway for reference
- -14%
 Select options This product has multiple variants. The options may be chosen on the product page Quick View
ESP32 4G LTE Gateway (Gen.1)
$119.99 – $129.99Price range: $119.99 through $129.99
In our Gateway, the GPIO configuration for the ESP32 modem interface is as follows:
- SIM7600 RST pin is connected to GPIO 5
- SIM7600 PWRKEY pin is connected to GPIO 4
- SIM7600 STATUS pin is connected to GPIO 36
- SIM7600 RXD pin is connected to GPIO 14
- SIM7600 TXD pin is connected to GPIO 33
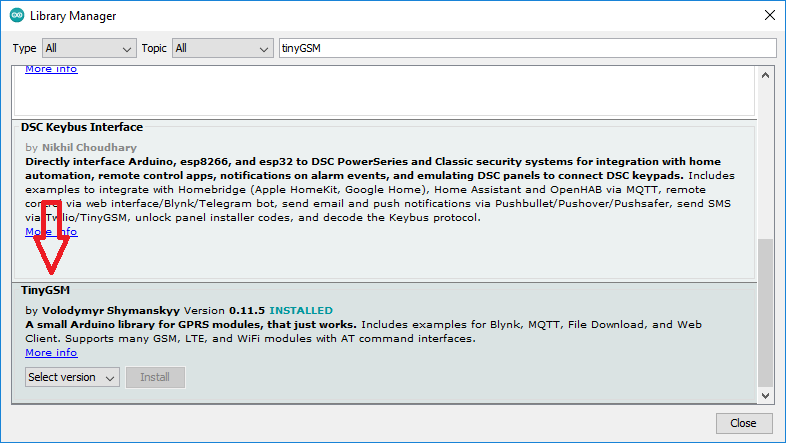
Install the Arduino Library - TinyGSM
TinyGSM is a neat and great library for adding cellular modem support to your ESP32 Arduino sketch. You can take a look at the TinyGSM GitHub page for more information on how to use the library.
TinyGSM has no library dependencies for regular operation. The library exposes very simple API calls that let you define a modem, power-up or reset the modem and then establish connection using APN setting for your particular SIM card. The following sections cover the entire process using sample source code and explanation.
Preparing the SIM7600 Modem after Power-Up
The ESP32 SIM7600 interface can be in an unknown state if the ESP32 re-boots without a system power cycle and the SIM7600 was still active and connected. Therefore, it is highly recommended to perform a complete modem reset in the setup() phase of the Arduino code:
SerialAT.begin(115200, SERIAL_8N1, MODEM_RX, MODEM_TX);
modem.restart();
Connect to the Internet
Connecting to the internet is simple once you have established connection with the modem and data flow is proper between the ESP32 and SIM7600.
To make the modem connect using an APN of your choice, simply call the modem connection API of the TinyGSM library.
modem.gprsConnect(apn);If the gprsConnect() function returns true, the modem is connected to the network successfully.
After connection is established, the Arduino client APIs can be used to send data to and receive data from any server… but the client should be the TinyGsmClient client instead of the regular Wi-Fi or ethernet clients.
Full ESP32 Arduino Example Code and Debug Logs
Here is the full example ESP32 Arduino sketch code used to connect to pcbartists.com and fetch contents of test.txt using a simple GET request over port 80.
const char apn[]      = "airtelgprs.com";

#define MODEM_RST            5
#define MODEM_PWKEY          4
#define MODEM_POWER_ON       36
#define MODEM_TX             14
#define MODEM_RX             33

// Debug console
#define SerialMon Serial
// AT command serial
#define SerialAT Serial1

// Configure TinyGSM library
#define TINY_GSM_MODEM_SIM7600      // Modem is SIM7600
#define TINY_GSM_RX_BUFFER   1024   // Set RX buffer to 1Kb
#define TINY_GSM_DEBUG SerialMon

#include <TinyGsmClient.h>

TinyGsm modem(SerialAT);
// TinyGSM Client for Internet connection
TinyGsmClient client(modem);

void setup() {
  // Set modem reset, enable, power pins
  pinMode(MODEM_PWKEY, OUTPUT);
  pinMode(MODEM_RST, OUTPUT);
  pinMode(MODEM_POWER_ON, OUTPUT);
  digitalWrite(MODEM_PWKEY, LOW);
  digitalWrite(MODEM_RST, HIGH);
  digitalWrite(MODEM_POWER_ON, HIGH);

  // Set GSM module baud rate and UART pins
  SerialAT.begin(115200, SERIAL_8N1, MODEM_RX, MODEM_TX);
  delay(3000);

  SerialMon.begin (115200);
  SerialMon.println("Restarting + Initializing modem...");
  modem.restart();
}

void loop() {
  SerialMon.println("Waiting for link to be ready...");
  SerialMon.println("Connecting to APN...");
  SerialMon.println(apn);
  if (!modem.gprsConnect(apn))
  {
    SerialMon.println("Failed to connect (APN)");
  }
  else
  {
    SerialMon.println("Connected (APN)!");
  }

  // Connect to pcbartists.com
  if (client.connect ("pcbartists.com", 80))
  {
    SerialMon.println("Connected!");
  }
  else
  {
    SerialMon.println("Could not connect to pcbartists.com");
    while (1)
      delay (10);
  }

  SerialMon.println ("Sending GET request to pcbartists.com/test.txt...");

  // Send a GET request
  client.println ("GET /test.txt HTTP/1.1");
  client.println ("Host: pcbartists.com");
  client.println ("Connection: close");
  client.println ();

  // Print response from server, including response headers
  SerialMon.println ("### Server response: ###");
  while (client.connected() || client.available())
  {
    if (client.available())
    {
      char c = client.read();
      SerialMon.print (c);
    }
  }
  SerialMon.println ("");
  SerialMon.println ("### End of response ###");

  client.stop();
  SerialMon.println ("Disconnected from pcbartists.com!");

  // Do nothing
  while (1)
    delay (10);
}
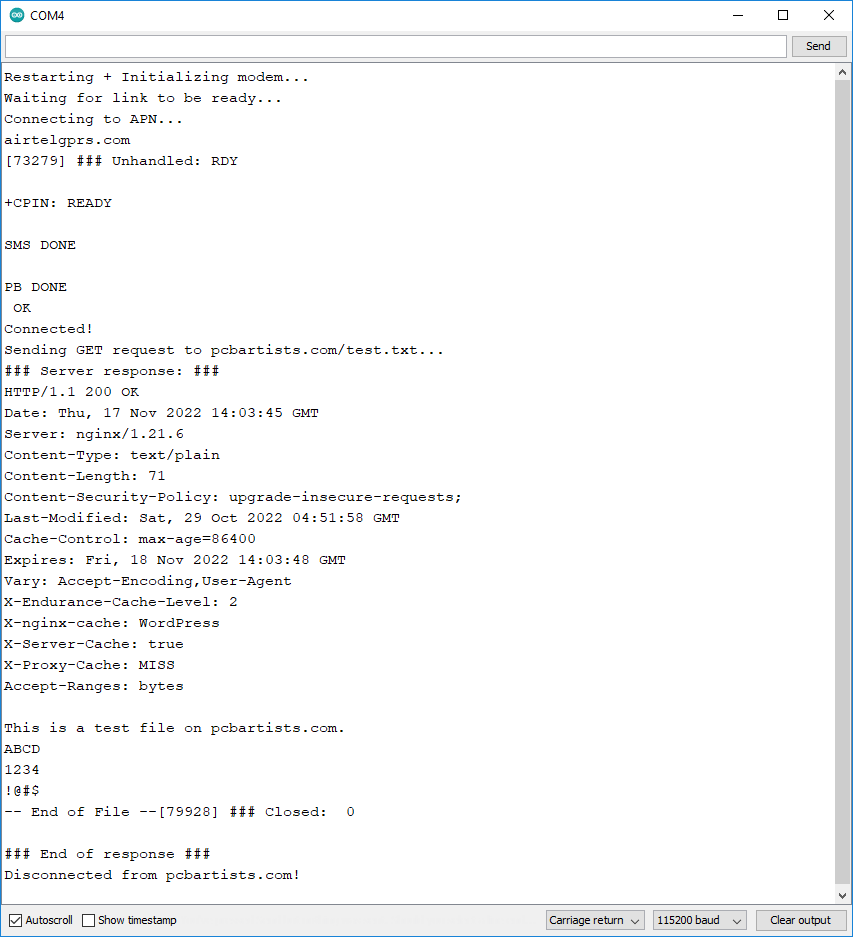
The result of the above code is shown in the following screenshot. The modem restart process takes about 30 seconds as per SIM7600 AT manual specifications and then the connection process is instant. The resulting Arduino debug logs are shown here.
Feel free to ask away via the Quick Contact form in the sidebar, or leave a comment below.
Change Log
- Initial Release: 17 November 2022
References
- Reference 1: Making GET requests using Arduino