Using LVGL with ESP32 can be a frustrating experience at first, especially if you are very new to LVGL and have not used it on some “officially supported” hardware before. Here are some notes on getting LVGL working with ESP-IDF from scratch.
I put together ESP-IDF v.5.0.1 (the latest stable version at the time of writing this article) and LVGL 8.3.0 (also the latest stable version available).
Components needed for using LVGL with ESP32
LVGL is not usable as a drop-in component with ESP32 and has some other dependencies if you want to use LVGL with real display and other GU devices. These dependencies can create a mess of inter-dependent components that refuse to work with each other and you might end up fighting build errors. Add to that the uncertaintly of using a new display that you have not used before and you can end up with a lot of work on your hands.
The main firmware components I used are the following.
- ESP-IDF development environment for ESP32
You can download ESP-IDF v.5.0.1 from GitHub. I had networking issues with IDF v.5.0.0 so I decided to stick with v.5.0.1 for all my product firmware and consulting work. - LVGL component for ESP32
LVGL is available on GitHub for downloading as-is. The documentation claims that you can simply place the LVGL repo content as a component and it would work with ESP-IDF projects. However, I noticed some issues with CMake when using LVGL directly off the GitHub repository.
What worked better for me is LVGL 8.3.0 from Espressif component registry.
To add it to my ESP-IDF project, I simply used the command line:
idf.py add-dependency “lvgl/lvgl^8.3.0”
You could get away with downloading a ZIP, but adding LVGL as a managed component is easier. - LVGL Drivers for ESP32
LVGL seems to maintain drivers for ESP32 separately. The repo has not been updated recently, but I guess that is because the driver code in there is still valid (expect for minor compatibility mods required). I used the master branch from LVGL ESP32 Driver repo on GitHub. - LVGL ESP32 Port for guidance
There is a repo called the lv_port_esp32. It contained references to a bunch of different versions of IDF, LVGL and drivers which I did not want to use. So I simply chose to refer to this for guidance on how to structure the code and app_main C code to make LVGL work.
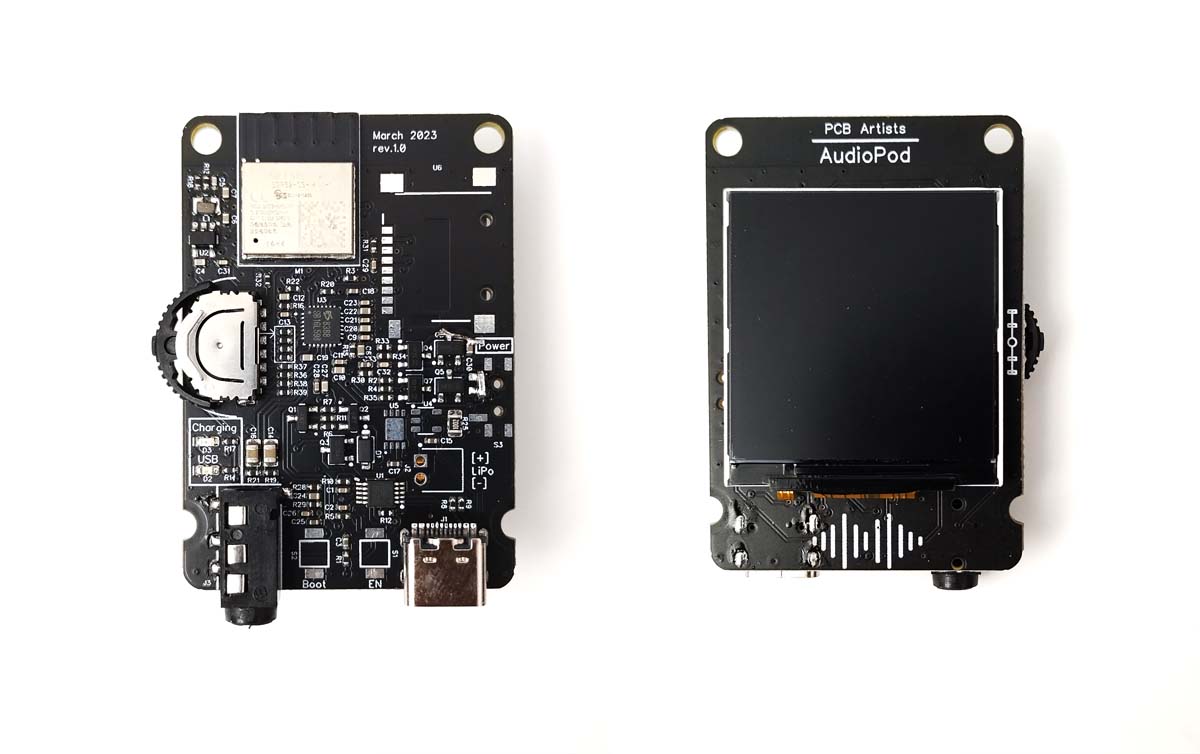
ESP32 hardware for trying LVGL
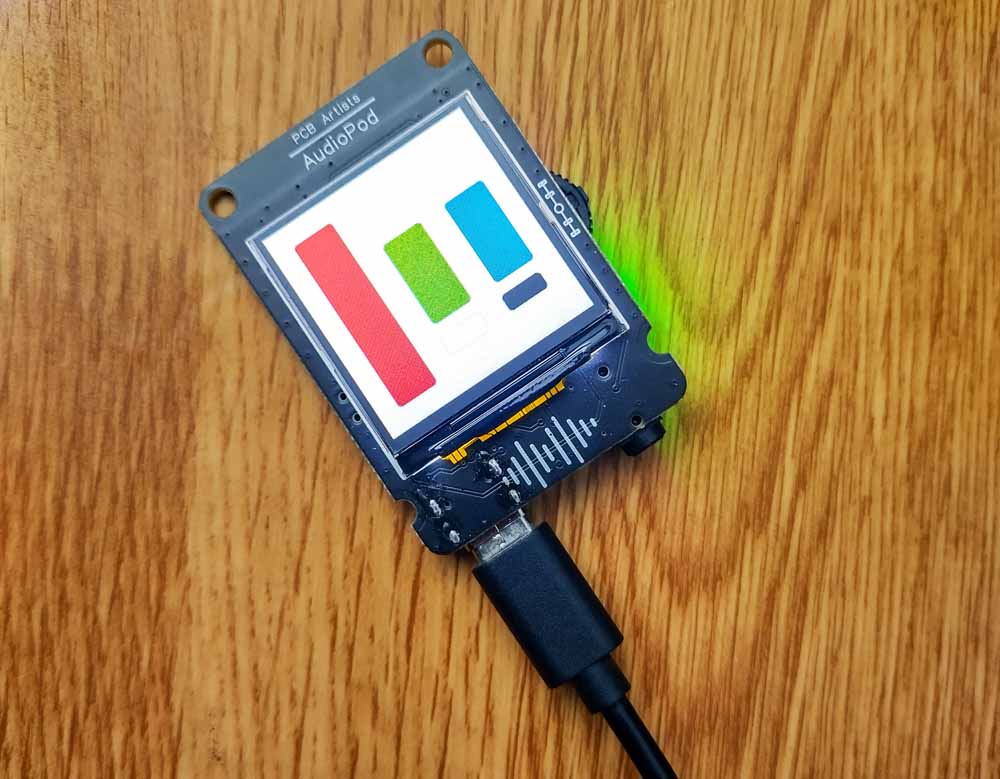
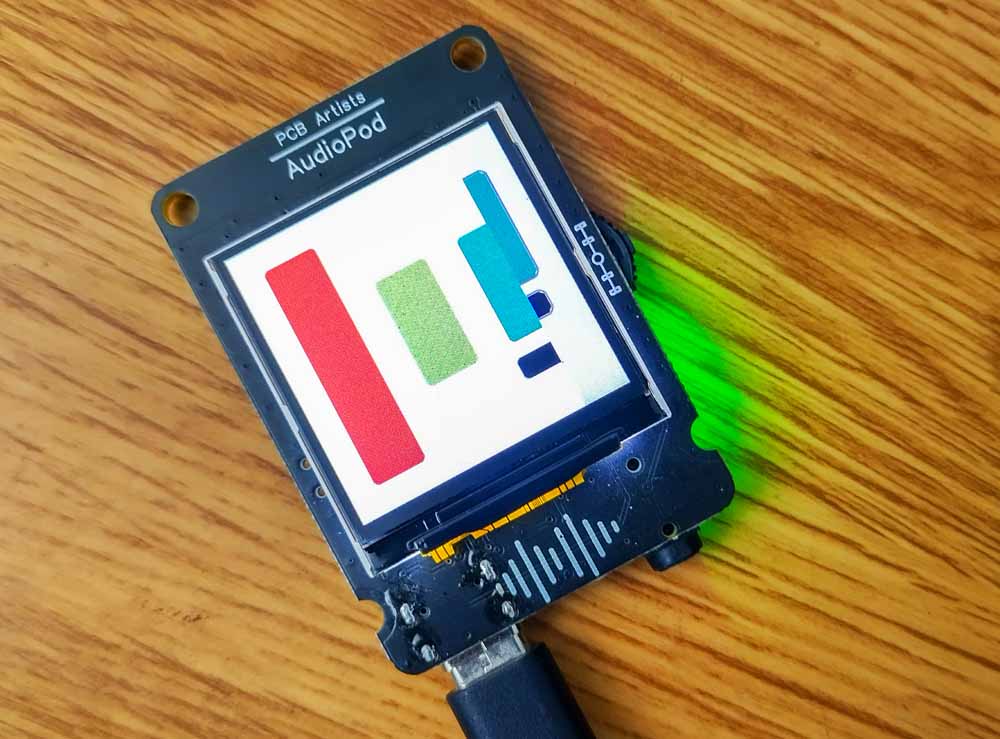
I was trying to test a new piece of hardware recently developed by us. This is a tiny ESP32-C3 based development board that combines ESP32-C3 with ES8388 for audio and also adds a 1.54″ 240×240 IPS LCD display based on ST7789 controller.
Thankfully, the driver IC used, ST7789, is already supported by the ESP32 driver repository. Adding support for a new LCD driver would be tricky if you are new to LVGL. However, to add a new display driver for LVGL with ESP32, you can do the following:
- Copy the C and H file for some driver already present in the LVGL ESP32 driver repository.
- Start modifying the display controller init function first to make it work.
- Verify that the display is initialized properly by filling it with a certain color.
Structuring the ESP-IDF project
Proper structuring of the ESP-IDF project is important. I simply created a copy of the examples/get-started/blink project to begin with. This is the directory structure used, the drivers are in a components folder and LVGL is a managed component (simply because I do not want to edit it).
LVGL source code is platform independent if you configure it right. Build errors that make you edit code in LVGL source files (such as header paths) almost always mean something is wrong with how your project is set up. Don't try to edit the LVGL source files, it is a rabbit hole to hell! Try to fix your project structure and CMake files instead.
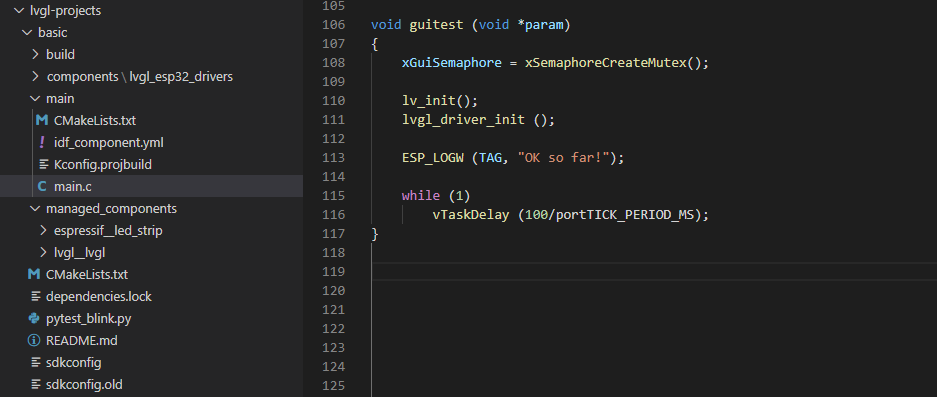
The above project structure and source code is all you should need to test if LVGL builds correctly. The lvgl_esp32_drivers contains some old code and header file references. You might have to edit that because driver code is always very dependent on ESP-IDF version. Make sure lv_init() and lvgl_driver_init() can at least be built.
I tried to build the LVGL examples included by default with LVGL, but finally gave up after something caused the demos to not be included in my build (even though menuconfig was set up properly).
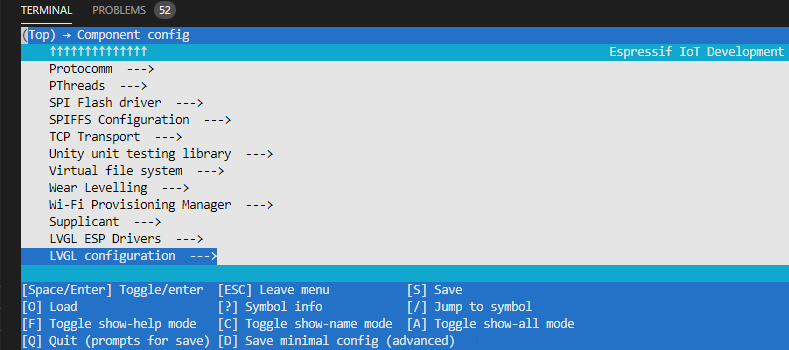
Also, if you did everything right, you should be able to see LVGL and LVGL driver options in the ESP-IDF menuconfig -> Component Config.
After updating header files and other easily-solvable API call and name related changes to lvgl_esp32_drivers, you should be able to build everything and flash on to your hardware. Some LVGL APIs are also different between v.7.0 and v.8.3, but they are easy to spot and resolve.
If you are using ESP32-C3 instead of ESP32, you might find the ESP32-C3 GPIO notes and ESP32 to ESP32-C3 porting notes useful.
Troubleshooting tips when using LVGL with ESP32
When using LVGL with brand new hardware, you might want to make sure that your LCD actually displays what you want it to display. SquareLine Studio is very helpful when trying to generate some simple code that you can then use as reference, knowing that it renders the correct elements. This simply takes out yet another variable from an already painful development effort.
Initialize the LCD reliably!
With LCD displays, initializing the display is the toughest part of it all. If your display controller is not configured properly, all kinds of things can go wrong and that would be no fault of the LVGL library itself.
LVGL relies on you to provide it with the correct drivers and LVGL assumes that you are able to see whatever the graphics functions are generating. If your display is not initialized, you will run into issues that are very hard to trace.
Make sure you can reliably initialize the LCD at the highest SPI clock speed that you prefer.
Calibrate the new LCD
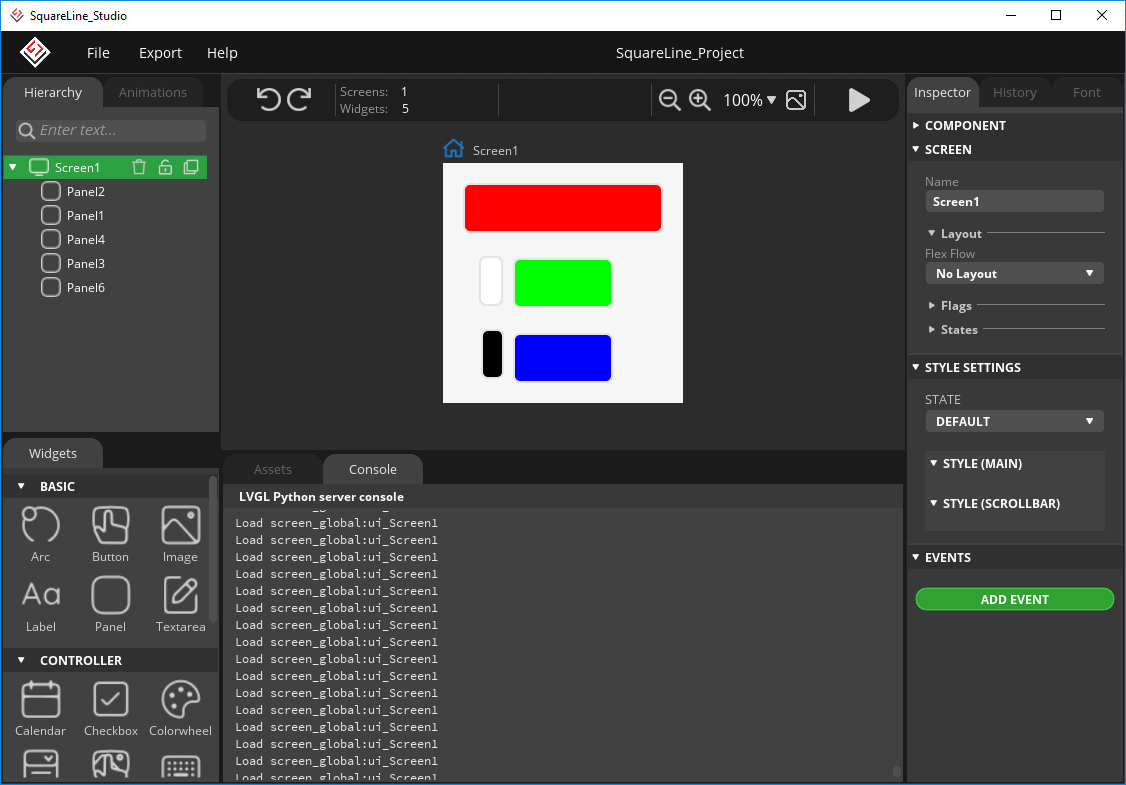
The simple idea with this project here is to render red, green, blue accurately to ensure that the color information is formatted correctly by LVGL. The black and white panels ensure that color inversion is set correctly. If they are rendered correctly but RGB panels are not, it means the RGB 5-6-5 color data is not formatted right. Finally, if the whole layout is messed up, you know it is an initialization error.
ESP32 LCD SPI bus speed
You should not set the SPI bus speed to auto in menuconfig. If the bus speed is too high, the display may either fail to initialize or start displaying strange artifacts because it did not receive data correctly.
It is extremely useful to set the ESP32 SPI clock speed to 4 MHz at the beginning to make sure communication is working properly. Double check SPI CPHA and CPOL values to match the display driver.
I noticed that the image on the LCD was corrupted at times when using SPI clock over 6 MHz. Seems like ESP32-C3 does not drive the SPI signals strongly enough for such high speeds. After adding some code inside disp_spi.c setting pad drive strength to maximum resolved the issue and I could use 20 MHz clock with the display – no problems at all!
void disp_spi_add_device(spi_host_device_t host)
{
    disp_spi_add_device_with_speed(host, SPI_TFT_CLOCK_SPEED_HZ);
    gpio_set_drive_capability (DISP_SPI_MOSI, 3);
    gpio_set_drive_capability (DISP_SPI_CLK, 3);
    gpio_set_drive_capability (DISP_SPI_CS, 3);
}
Have Something to Say?
Feel free to ask away via the Live Chat, drop us a message using the Quick Contact form in the sidebar, or leave a comment below.
Change Log
- 16 March 2023
– Initial release
1 comment
Great article. Thanks for taking the time to write it. I just moved from Platformio to espressif esp-idf and have been struggling to get lvgl set up (by coincidence also on a C3). The article helped a lot.
Thanks again!