A monochrome graphics to C code converter can be very useful when designing products that use pre-determined graphics on E-Paper displays.
For monochrome displays like E-ink displays that only contain pixels of 2 colors per frame, the data format is usually 1 bit per pixel.
Each bit in a byte represents black or white. A byte itself may represent a row or column of 8 pixels.
On this page, we take a look at how you can generate a C array from a black-and-white bitmap image.
Download Recommended Software
While there are way too many options available for converting images to C arrays, here is one that we recommend for Windows users:
The converter is very simple and easy to use. It gets the job done and does not require any installation.
Using LCD Assistant to convert graphics
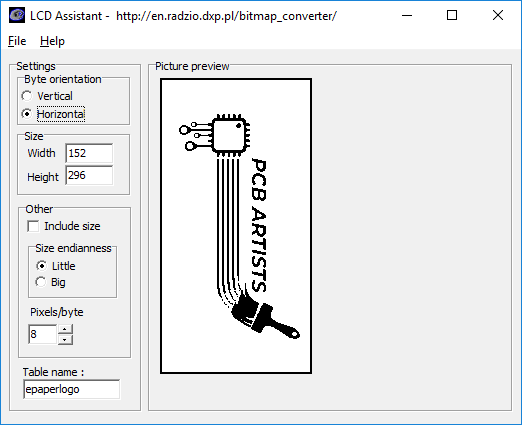
To convert graphics in the correct format and to use the resulting C array with our sample code, you should use settings as shown in the following LCD Assistant screenshot.

You can load images using
File > Load Image
The output can be saved using
File>Save Output
The resulting output C array should then be renamed as needed and added to “epaper_graphics.h” header file in the sample code.
Saving C array to MCU flash
You have to remember that not all development environment setups for all MCUs will automatically just place the converted C code array in MCU flash.
If you just saved the output C array as
It might not be stored in the MCU flash and might be loaded up into the MCU SRAM instead.
This can be solved by adding attributes to the C array and force it into flash storage for look-up purposes only.
For example, on ESP8266, you could do it by
That being said, you have to refer to the sample code specific to your MCU to determine how you can place the C array into the flash of the MCU.
In case you need any help with our products, feel free to drop us a message and we will get back to you!
References
None